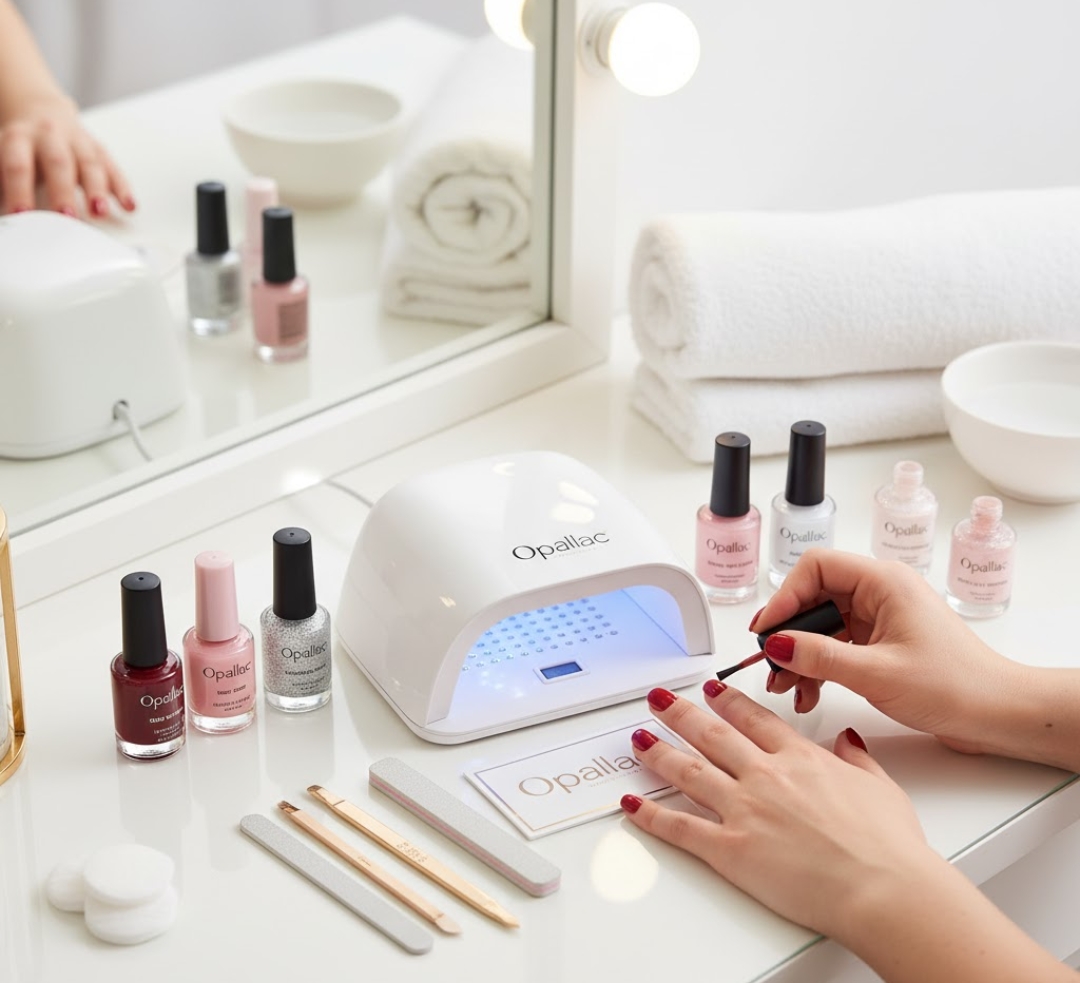
Getting salon-worthy nails at home isn’t some impossible dream anymore. A gel nail kit by Opallac gives you everything needed to create long-lasting, glossy manicures without booking expensive appointments. These kits typically include gel polish, a UV or LED lamp, base and top coats, and prep materials. The chemistry behind gel nails involves photoinitiators that react to UV light, causing the polish to harden into a durable finish that can last two to three weeks. Understanding the proper technique makes the difference between a professional look and a messy DIY disaster.
Getting Your Nails Ready Makes or Breaks Everything
Honestly, this part is more important than people realize. I used to skip prep and wonder why my gel polish would peel off after three days—turns out I was basically setting myself up for failure. Start by pushing back your cuticles gently with an orangewood stick. Don’t cut them unless absolutely necessary because that can lead to infections.
Next, file your nails to your preferred shape. I’m a sucker for the oval shape, but square or almond works too depending on your style. Here’s where it gets technical: buff the surface of your nails lightly with a 180-grit buffer. This creates tiny grooves that help the gel adhere better. You’re not trying to thin out your nail plate, just rough it up a bit.
Wipe each nail with rubbing alcohol or the prep solution that comes with your Opallac kit. This removes oils and moisture that would prevent proper adhesion. Your nails should feel squeaky clean and slightly dry to the touch.
The Base Coat Is Your Foundation
Apply a thin layer of base coat to each nail, making sure to cap the free edge by running the brush along the tip. This seals the edge and prevents chipping. I learned this trick from a nail tech who told me most people forget this step and then complain about their manicure not lasting.
Cure under the LED lamp for the time specified in your kit instructions—usually 30 to 60 seconds. Don’t skip this or make it shorter because partially cured base coat won’t hold your color properly. The lamp emits specific wavelengths between 395-405 nanometers that activate the photoinitiators in the gel formula.
Color Application Requires Patience
Here’s where I always want to rush but shouldn’t. Apply your first coat of gel polish in a thin, even layer. Thick coats don’t cure properly and end up wrinkling or staying tacky underneath. Start with a small bead of polish near the cuticle, then push it back slightly before sweeping toward the tip.
Cap the free edge again—seriously, don’t skip this part. Cure according to instructions. Apply a second thin coat the same way and cure again. Two thin coats always look better than one thick coat, even though it feels like you’re wasting time.
If you get polish on your skin or cuticles, use an orangewood stick dipped in rubbing alcohol to clean it up before curing. Once it’s cured, that mistake is permanent until you soak the whole thing off.
Top Coat Seals the Deal
The top coat is what gives you that glass-like shine everyone associates with gel nails. Apply it the same way—thin layer, cap the edges, cure completely. Some top coats leave a sticky residue called the inhibition layer. Wipe it off with rubbing alcohol on a lint-free pad.
Your nails should feel hard to the touch, not tacky or soft. If they’re still squishy, you didn’t cure long enough or your lamp might be losing power. LED lamps typically last 50,000 hours, but cheaper ones can degrade faster.
Maintenance Between Manicures
Apply cuticle oil daily. I keep a bottle on my desk and use it whenever I remember. It prevents the gel from drying out your natural nails and keeps everything looking fresh. If you get a chip, you can do a quick repair by filing the area smooth, applying base coat, color, and top coat just to that nail.
When you’re ready to remove the polish, soak cotton pads in acetone, place them on each nail, wrap with foil, and wait 10-15 minutes. The gel should slide off easily. Never peel or pick at gel polish because you’ll damage your nail bed—I made this mistake once and regretted it for weeks.
Disclaimer: This article is for general information only. It is not professional or medical advice. Always follow the instructions that come with your Opallac kit or any nail products you use. Be careful when using UV or LED lamps and nail tools. The writer and website are not responsible for any damage, injury, or results from following this guide. Use all products safely and at your own risk.